

Interface Table interface |

|

|

|

|

|
||
|
Interface Table interface |
|
|
|
|

|

|
Interface
Table interface
|
Interface Table interface |
|
|
|
|
|
||
|
Interface Table interface |
|
|
|
|
|
|
|
|
||
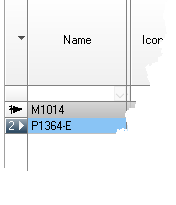
To select camera (row) bring the cursor to the left end of the row. The cursor should become a right arrow![]() . Then click on this place. The selected row will be highlighted and marked by the sign
. Then click on this place. The selected row will be highlighted and marked by the sign ![]() .
.
To select adjacent cameras use up arrow and down arrow keys.
By pressing the down arrow key on the bottom row, new camera will be created.
To select a column bring the cursor to the border between header and data of the column. The cursor should become down arrow ![]() . Click on this border.
. Click on this border.
To select several columns hold Ctrl. To select range of columns hold Shift or move the cursor, holding the left mouse button.
Bring the cursor to a corner cell of a region, press the left mouse button and then move the cursor, holding the left mouse button pressed. After selecting the region release the left mouse button.
To select a cell, click on it. To edit, click on the selected cell once again. In most cells it is possible to choose parameter value from the list.
It is possible to move around the cells using keys with arrows. For editing press Enter.
Some cells admit choice from the list of values only.
Some cells are protected from editing. Check Fix checkbox below to edit these cells.
Bring the cursor to border of a column on the header. The cursor will become a double arrow ![]() . Press the left mouse button and move the cursor. After getting the necessary width release the mouse button.
. Press the left mouse button and move the cursor. After getting the necessary width release the mouse button.
Bring the cursor to border of a row on the left edge of the table. The cursor will become a double arrow ![]() . Press the left mouse button and move the cursor. After getting the necessary height release the mouse button.
. Press the left mouse button and move the cursor. After getting the necessary height release the mouse button.
You can change height only for all rows simultaneously.
To move a column, place the cursor on the column header. Press the left mouse button and move the cursor. After moving column, release mouse button.
To move a row, position the cursor over the leftmost column with row numbers. The cursor changes to the right arrow.
Select the row by clicking. Then press the left mouse button. A red line appears above the row.
Move the cursor along the left column with line numbers. After moving the red line to the target of moving the row, release the left mouse button.
You can set visibility of columns, save and restore different table structures as views.
To show/hide any particular column:

| • | Click on the black triangle on the top-left corner of the table; |
| • | In the appeared menu choose Visible columns; |
| • | In the appeared list of all columns check or clear name of necessary columns. |
See: Main menu>Views and Tool bar>Views.
You can set visibility of columns, save and restore different table structures as views. See: Main menu>Views and Tool bar>Views.
To sort by the parameter value in the column, just click on the column header. Reclick changes sort order to the reverse one..
You can filter cameras from the table according to any flexible criteria. For example, you can calculate traffic for cameras on separate layout, for cameras of specific model, connected to specified network equipment etc. You can also calculate traffic on specified network segment and disk size for specified storage. You need not to create separate projects – use filters!
Filtering is useful also for selecting cameras with the traffic exceed specified value, for optimization and in many other cases.
Click on the arrow in the combo box at the column top (between parameters values and header) ![]() and choose parameter value from the list.
and choose parameter value from the list.
In this combo box you can specify following filters:
| • | Order by descending; |
| • | Order by ascending; |
| • | Clear filter; |
| • | Custom; - Combined custom filter with several conditions. |
| • | All - all rows; |
| • | Not empty - only not empty; |
| • | Empty - only empty. |
| • | Boxes with possible field value. Just select needed values. |
You can assign filters to multiple columns at the same time.
In the lower left corner of the table, above the toolbar there is the Search bar. To search in the entire table of cells containing a specific value, enter this value in the search bar. During the typing process, matches found in the table will be highlighted in yellow.
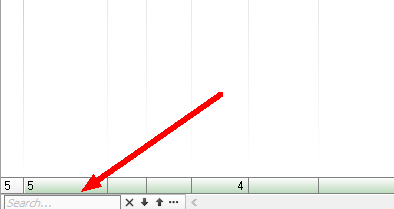
The number of matches found is displayed to the right of the search line, and to the right there are buttons to display strings with search results, move through search results, and open the search options menu.
To open the Camera detail panel, click [+] on the left of the row or click on the Camera>Detail button ![]() on the Toolbar.
on the Toolbar.
See also: Camera detail panel.